How to use IPv6 for docker containers on Digitalocean
August 7, 2017
You get ipv6 adrresses on digitalocean for free, so why not give your containers an address which is reachable from everywhere in the world?
A few words
You only get a routable space from xxxx:xxxx:xxxx:xxxx:xxxx:xxxx:xxx0 to xxxx:xxxx:xxxx:xxxx:xxxx:xxxx:xxxf, which means your’re able to use 14 addresses for your containers (-2, because of droplet address and network address).
Since we need to tell docker which subnet to use, I will use xxxx:xxxx:xxxx:xxxx:xxxx:xxxx:xxx0/124 in this tutorial, which will give you 14 addresses available to your containers.
Since we’re only part of a subnet, we need to enable NDP Proxying on the droplet later on.
You could read more about NDP Proxying here
Start
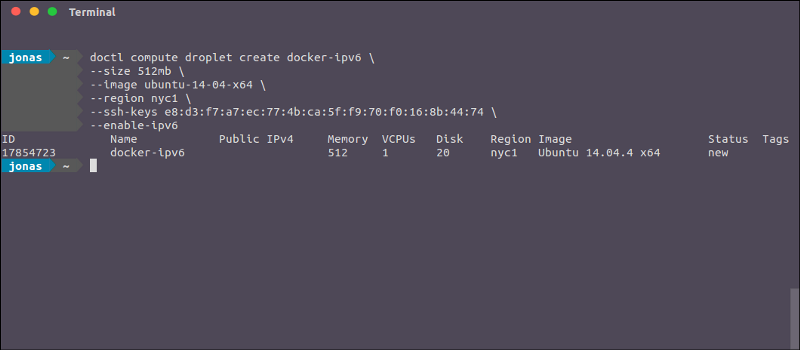
First, create a new droplet. I use the smallest kind of droplet, but every kind should work. Just make sure you activate ipv6.
After creating, it should look somewhat like that on the DO page:
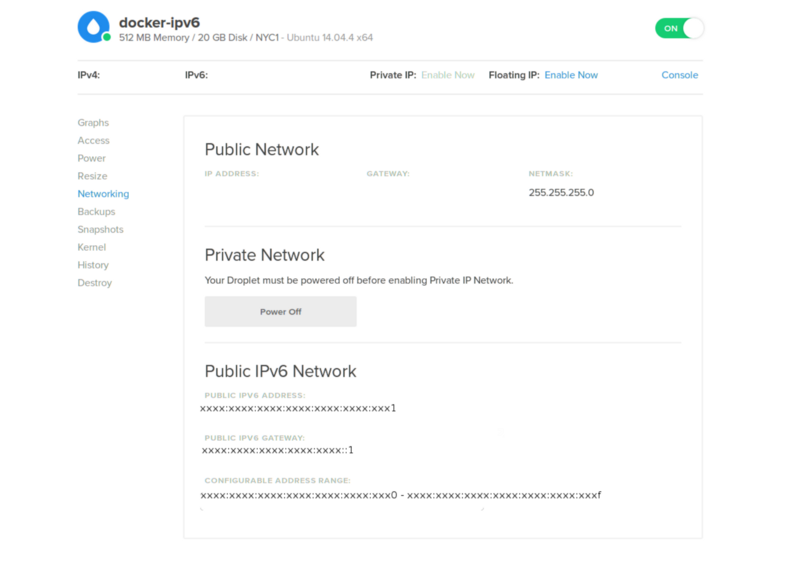
Setting up your droplet
Login in into your droplet, head over to docker.io and install docker.
Recently the docker page got quite confusing, make sure you take the CE (Community Edition) and install it on your system.
Configuring the docker daemon
With your favorite text editor open /etc/default/docker (with sudo, otherwise, you won’t be able to write), find the line
DOCKER_OPTS=””
and replace it with
DOCKER_OPTS="--ipv6 --fixed-cidr-v6 xxxx:xxxx:xxxx:xxxx:xxxx:xxxx:xxx0/124"
Setting up NDP Proxying
NDP(Network Discovery Protocol) is basically the DHCP Replacement for IPv6. Because our host already has an address assigned from the subnet docker will use, we need to make sure NDP takes that into account, which is done by NDP Proxying.
To do that, just execute the following command on your droplet to activate NDP Proxying
user@droplet $ sudo sysctl net.ipv6.conf.eth0.proxy_ndp=1
Restart the docker daemon
Now we’re ready to go, so restart the docker daemon
user@droplet $ sudo service docker restart
Running containers
Sadly, we need to tell the host for every container we run which ipv6 address it got, so the host is able to route the traffic to the corresponding droplet.
So, start your container, exec a shell and run
user@droplet $ sudo ip a
You should see an ipv6 address from the correct subnet, if it’s your first container it should get the address after your host.
Let’s assume you get the address: 2001:XXXX::X009
To tell that to the host, execute
user@droplet $ sudo ip -6 neigh add proxy 2001:XXXX::X009 dev eth0
Fin
Your container should now be available from everywhere in the world, congratulations!
Troubleshooting
If you’re not able to reach it, make sure you disable the firewall.
On ubuntu that’s done by
user@droplet$ sudo ufw disable